Showing posts with label design. Show all posts
Monday, 3 June 2013
5 favourites
Today I am going to share 5 of my favourtie blogs with you. I read a few blogs but these five are the ones that I tend to read everyday:
A Beautiful Mess: wonderfully creative and inspiring blog with great DIY and craft projects to brighten up your day.
The Dainty Squid: Kaylah shares her quirky collections and unique style. I have to say that I'm a little bit jealous of her collection of cacti and succulents.
Little Chief Honeybee: charming and refreshingly honest blogging and lovely photography from Kaelah. And her two dogs are adorable.
Hip Hop Sideproject: great blog from Kim, just up the road in Huddersfield, giving honest and helpful advice on how to survive making a living from something you love.
Tigerprint: the home of Tigerprint, greeting card designers for M&S, originally formed in Brighouse (wooo). This blog showcases lovely print and pattern. They also run regular competitions which are always worth a look.
There are so many blogs out there and I discover and add new ones to my list everyday.
Sunday, 24 February 2013
52 creative projects : 6/52 - cloud badges
Recently I have been buying handmade brooches from Etsy, including this awesome hedgehog one from Debbie Greenaway and this lovely fox one from Layla Amber. I have been looking for a new brooch to buy but then thought why not have a go at making one myself.
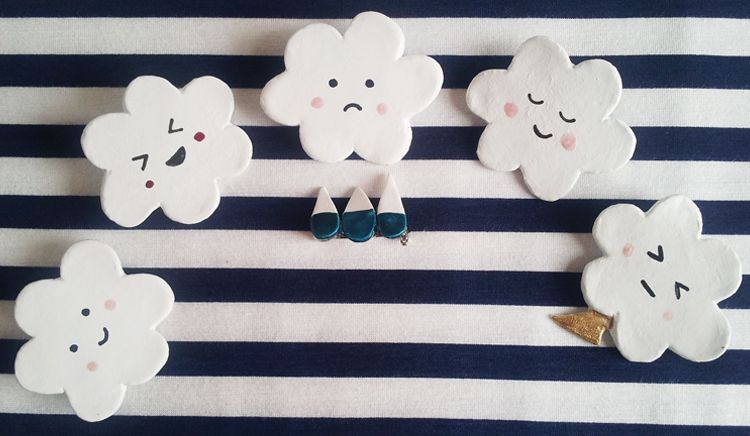
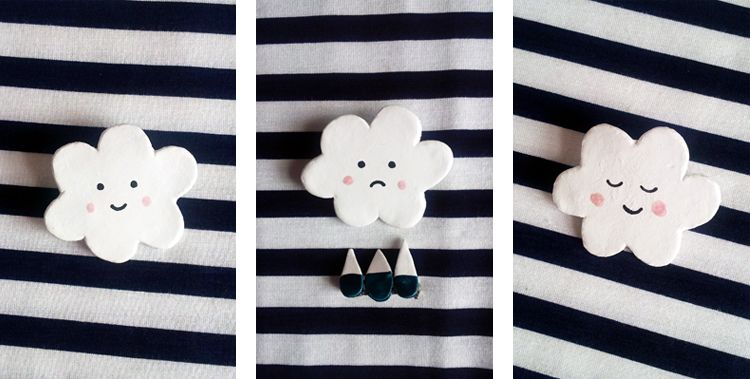
I have some white air drying clay that I had left over from a Christmas DIY and thought I could do something with that. I decided to make a series of cloud brooches with different emotions. I have done something similar to this before but out of felt but unfortunately I don't have any photographs of them as I sold them all.
I rolled out the clay and drew a simple could shape onto card to use as a template. I cut out 5 cloud shapes, a lightening bolt and a few raindrops out of the clay and then left them to dry for a few hours.
Once dry I used a porcelain painter pen to draw on the eyes and mouths giving each of the clouds a different emotion. Rather than using paint I decided to use nail varnish for the cheeks and other details to add some colour. Once the faces were dry I gave them a thin coat of mod podge and stuck brooch pins to the back using a hot melt gun.
I have some white air drying clay that I had left over from a Christmas DIY and thought I could do something with that. I decided to make a series of cloud brooches with different emotions. I have done something similar to this before but out of felt but unfortunately I don't have any photographs of them as I sold them all.
I rolled out the clay and drew a simple could shape onto card to use as a template. I cut out 5 cloud shapes, a lightening bolt and a few raindrops out of the clay and then left them to dry for a few hours.
Once dry I used a porcelain painter pen to draw on the eyes and mouths giving each of the clouds a different emotion. Rather than using paint I decided to use nail varnish for the cheeks and other details to add some colour. Once the faces were dry I gave them a thin coat of mod podge and stuck brooch pins to the back using a hot melt gun.
Wednesday, 6 February 2013
colour inspiration: tea time pastels
I am currently working on a new set of illustrations and wanted to try a new approach to colour. My work tends to be quite bright, using strong, bold colours, but for this set of illustration I felt that a different approach was needed. So I have been collecting some colour inspiration.
Lately I have been drawn towards a much more muted palette, dusky pink tones, pale blues and and soft greys. A simple but pretty combination ready for Spring, which I think will be perfect for what I am working on!
Sunday, 27 January 2013
52 creative projects: 2/52 - handwriting font
For the second of my 52 creative projects I decided to create my own font.
I have been looking for a handwriting font for a while now to use for my logo and product packaging but after spending hours trawling the internet I still hadn't found one that I really liked.
Then whilst looking on Pinterest I found a link to myscriptfont.com, a free online tool that allows you to create a vector font from your own handwriting. It promised to be super easy and really quick.
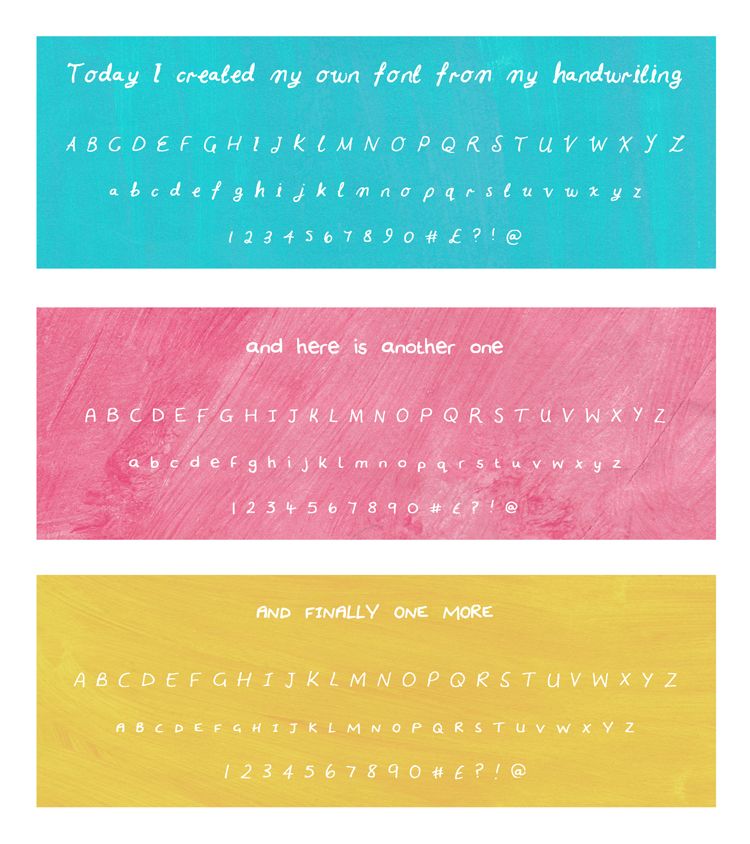
All you have to do is go to the website, download the PDF template, print it off and fill it in (or complete on a tablet if you have one), scan it in and upload it. Then all you have to do is download your font and you'll end up with something like this:
It really is that simple and you will end up with a font that is totally unique. I am also going to try completing the template with pictograms to see how that turns out.
Go on give it a go!
I have been looking for a handwriting font for a while now to use for my logo and product packaging but after spending hours trawling the internet I still hadn't found one that I really liked.
Then whilst looking on Pinterest I found a link to myscriptfont.com, a free online tool that allows you to create a vector font from your own handwriting. It promised to be super easy and really quick.
All you have to do is go to the website, download the PDF template, print it off and fill it in (or complete on a tablet if you have one), scan it in and upload it. Then all you have to do is download your font and you'll end up with something like this:
It really is that simple and you will end up with a font that is totally unique. I am also going to try completing the template with pictograms to see how that turns out.
Go on give it a go!
Subscribe to:
Posts (Atom)